Introduction
So you're here and decided to take a look at how POST and GET requests work with SSJS, but you don't know how! You're in the right place to do so, because you'll get a real life example of how this work.
Such requests are very important because you may interact with your data extensions or your automations using Ampscript or SSJS, but sometimes you'll find yourself in situations where you'll have to extract some data from external resources, so basically consuming other APIs, other services that can offer you a different type of Data that SFMC does not provide.
In the example we're going to work with, we are going to use Bitly, the famous links shortener. This has been used in a real life example where I had to send SMS to subscribers and the SMS was asking subscribers to click a link, but as you may have already noticed, CloudPages links with qs parameter in them look so long, they will either look bad in the SMS or in some cases get the SMS splitted into two messages instead of one because the link may contribute to exceeding the numbers of characters allowed for the SMS. But this was done using AMPSCRIPT not SSJS, but let's do it with SSJS in a CloudPage.
Use case is clear ? Great! Now let's get back to business
Prerequisites
- Bitly Account - Free
- You know how to create CloudPage and Code Snippets in SFMC
- Basic SSJS to send variables from Ampscript to SSJS and vice-versa, Check here
Demonstration
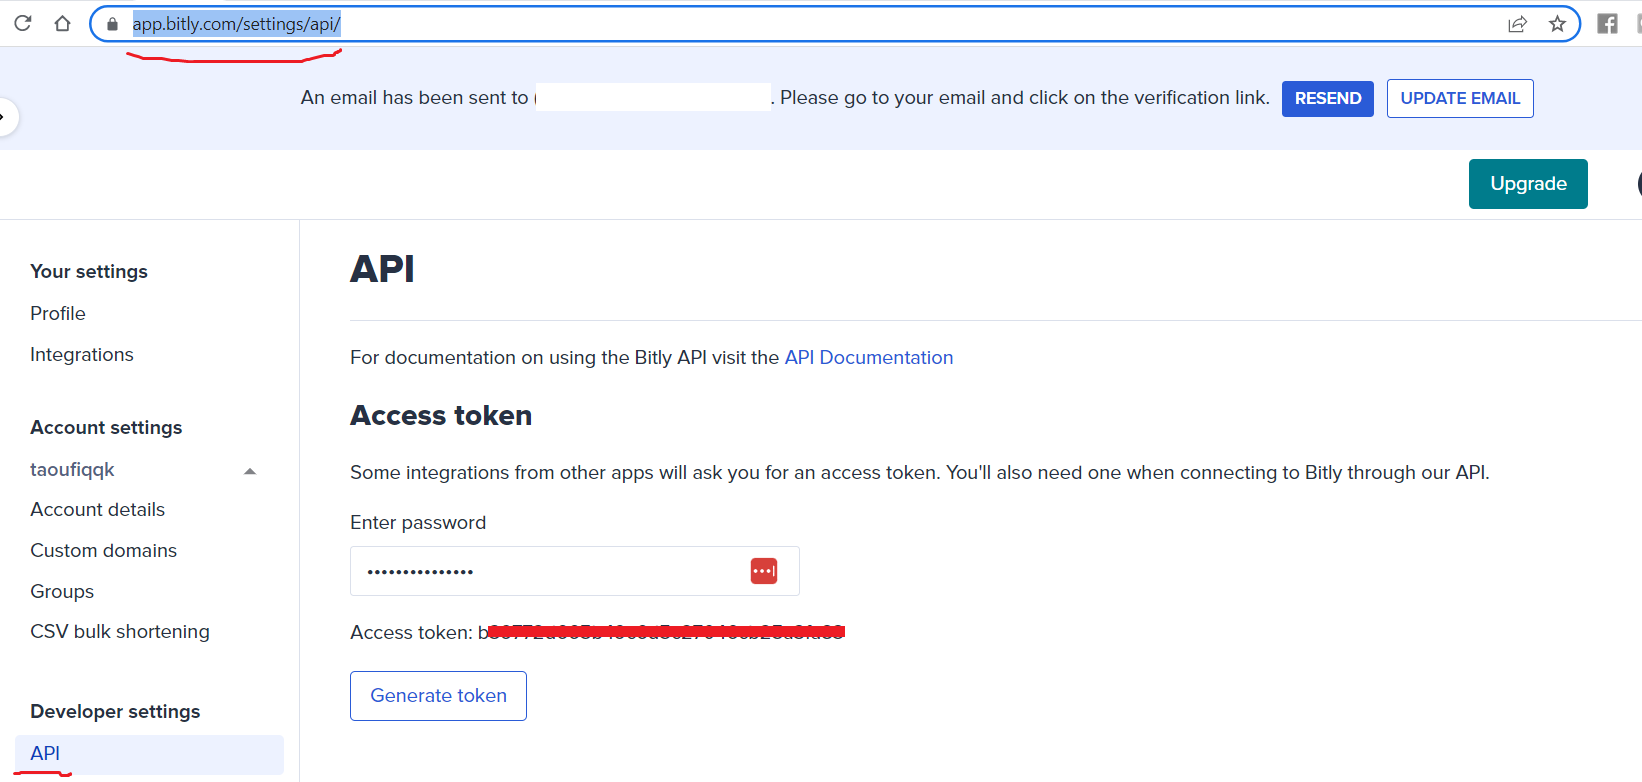
I assume you have checked the prerequisites section, if you did not, remember that you'll need an account and please do it here. After that move directly to the Developer Space for Bitly, and then try to get your access token, by providing of course your account password.
Do not forget to store your token somewhere, because we're going to definetly use it :D
Time to jump to Marketing Cloud!
Go to Content Builder and Create a Code snippet, in the code Snippet Write this piece of code.
So, it is clear what you'll have to do! right ? not yet ?
Take your Access Token and place it in the apitoken variable, and in the third line we're going to use the url as you see in the script in order to retrieve the group_guid associated to your account.
Now create a Cloud Page and check if our group_guid has been extracted successfully, you can test by including the Code Snippet at the top of the Cloud Page.
%=ContentBlockById("Your_Code_Snippet_Id")=%
I already tested this code, and got successfully my group_guid.
In Case you aren't aware yet! We have used the SSJS HTTP.GET method that send the GET request to the Bitly API, we sent our Token in the headers of the request using the headerNames & headerValues variables.
After that we used this to transform the format of the response into a Javascript Object, Note that HTTP.GET requests return an object with the Content Property that is a Stringified Object that is in fact teh response we're getting from the API.
Now, we need to move to the POST request that is going to help us shorten the link we desire, before doing so, please check the payload that has to be sent to API here.
So we're basically sending this in our POST Request body, the group_guid is what we've retrieived already, the domain is bit.ly for the free version ( my understanding is for the non-free plans you can send your own short domain , the long_url is the url you want to shorten.
    {
    "group_guid": "we re going to place here our guid we got from the GET request",
    "domain": "bit.ly",
    "long_url": "let's put the article link ;) =>
    https://quick-martech-snippets-663ac1d40605.herokuapp.com/4mv4gqtmrl"
    }
Now back to our script, we are going to do the same as before with the GET request, except that we're going to add the body in our request.
I know you got what we have done here, now I expect you to update your code snippet and save it and then rerun the CloudPage, I already got my bitly url generated while preparing this turorial for you and here it is : https://bit.ly/3KMc4lR.
Now, since you have your generated url in SSJS, you can pass it to your AMPSCRIPT using this, and then display it in your HTML. Check the code below
Click here :
%=v(@generatedUrl)=%
And now it is DONE.
Conclusion
In this Tutorial, you did not only learn how to use POST and GET requests, but you got a very good tip to shorten your url in the future in your CloudPage As said already, learning how to consume external services is very important to your Marketing Setup, SFMC offers many powerful features, but sometimes your only way is to do some custom develomment, and SFMC is very powerful in this as well by giving developers the freedom and the ability to do Web Dev from within SFMC content.